


What can be more satisfying for an average homebrewer than pouring a nice, fresh, cold one from a homemade keezer? It’s an ambitious yet quite manageable DIY project that becomes much easier to complete if you’ve got the right keezer conversion kit.
Beverage Craft offers the best keezer kits for easy and enjoyable conversion allowing you to build a perfect home beer dispensing system. This particular DIY keezer kit features all the basic components you will require for building a fine keezer featuring one beer line.
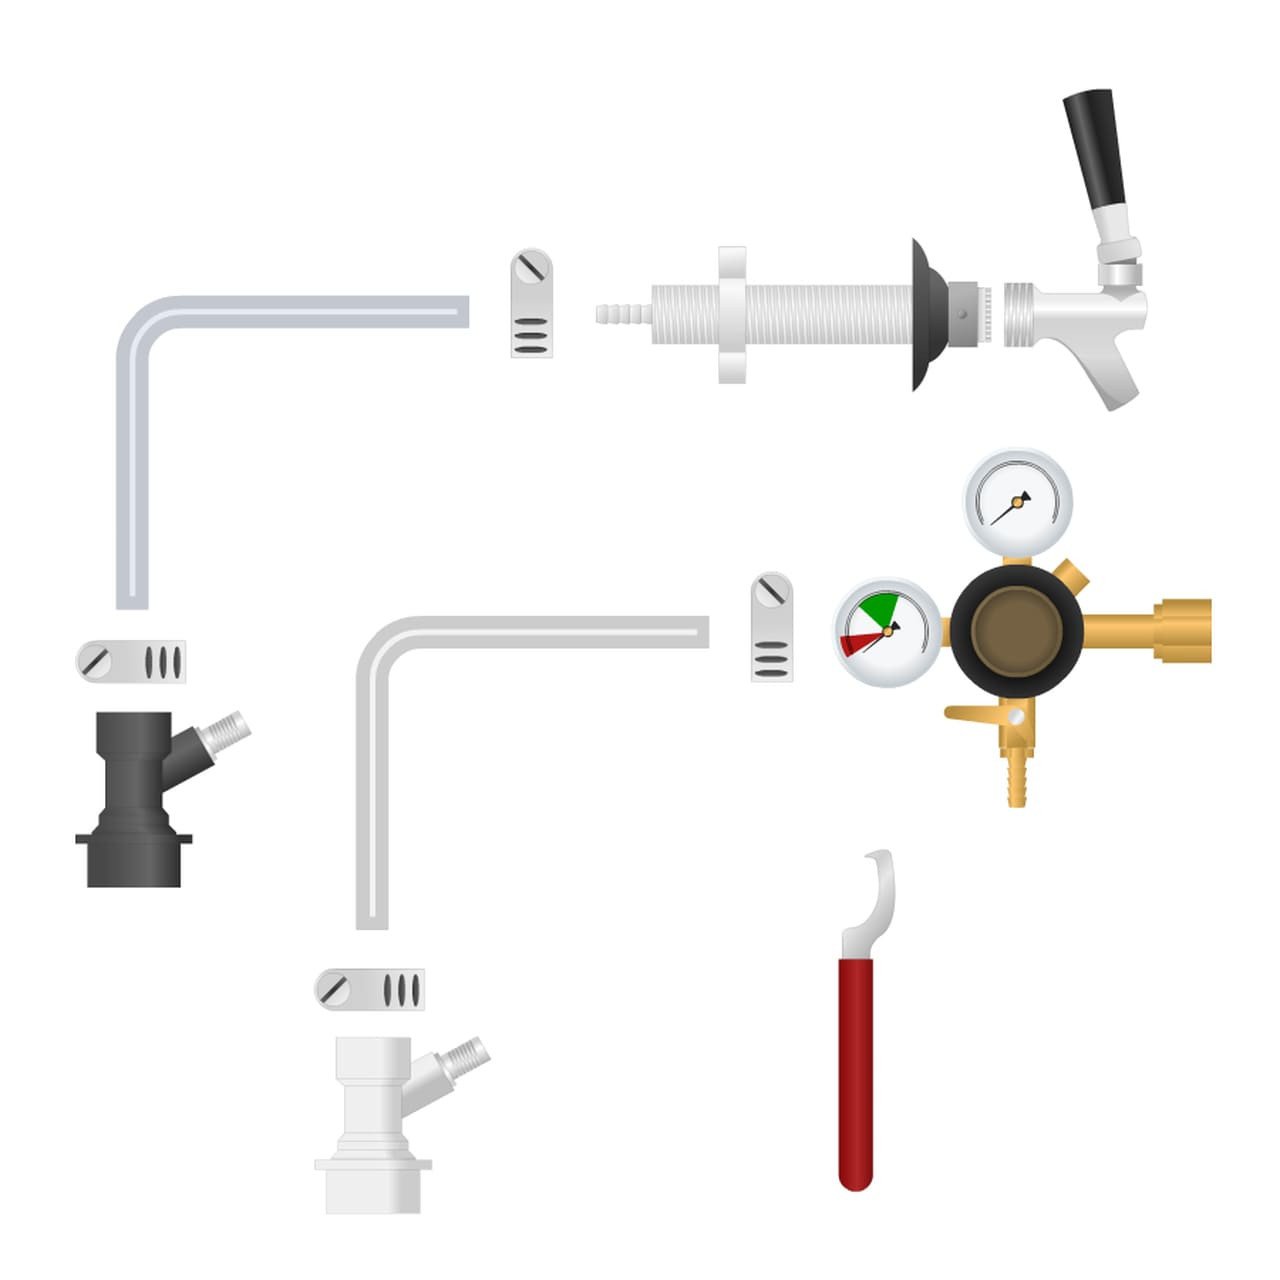
Keezer Conversion Kit: What’s Inside
- Primary CO2 regulator (60 PSI, by TapRite)
- Domestic faucet (polished stainless steel)
- Ball lock - gas, with quick disconnect
- Ball lock - liquid, with quick disconnect
- 5⅛" shank with 3/16" bore & nipple (stainless steel)
- 5ft of 3/16" vinyl tubing
- 4ft of ¼" braided vinyl tubing
- 4 of 5/16-⅜" stainless steel gear clamps
- red faucet wrench
Please note: this keezer build kit does not include a CO2 tank but you can always purchase one easily from Beverage Craft.
Using a Homebrew Kegerator Conversion Kit to Build a Keezer
Despite having a fancy name, a keezer is nothing more than a chest freezer repurposed for dispensing kegged beer. Building a keezer is a fairly easy process if you have some basic DIY skills and, of course, the right keezer parts kit.
- Getting a chest freezer
It all starts with a chest freezer, which you can easily get at any home appliance store or buy a used one on eBay, Craigslist or Kijiji. When looking for a chest freezer, you have to decide on these three things:
➔ Space and placement
➔ Capacity and volume of beer
➔ CO2 tank - inside or outside? - Once you’ve got a chest freezer and your conversion kit to convert a refrigerator or keezer, it’s time to proceed to the conversion stage.
- Disconnect the freezer door hinges and remove the lid of the freezer
- Build a lumber collar to house the tapped faucet(s)
- Assemble and connect the gas side and liquid side tubing
- Reattach the hinges and lid, attach faucet shanks and faucets themselves
- Set the temperature control and pour a glass of beer!
Of course, this is just one of the possible ways to build a keezer if you have a keezer 1 tap kit. For more useful information and homebrewing tips, be sure to check out our blog.
If you haven’t found an item or part you are seeking for don’t hesitate to contact our managers on email sales@beveragecraft.com to inquire about the availability. We have new arrivals each week and are always here to help.
Related Products


