
Make Your Own Keg Fridge at Home
Posted by Ron on 29th Jan 2021
We all dream of enjoying a frosty pint of draught beer in the comfort of our own homes. By following this easy, yet comprehensive guide you’ll be able to get started on building your very own home keg fridge. Your DIY skills can save you a few hundred dollars in making your at-home draught beer dreams come true. Let’s see how it’s done.
Types of Homemade Kegerators
Homemade kegerators are basically just converted refrigerators. Your first step will be deciding what type of fridge to use as the base for your future kegerator. Here are a few basic choices:
- full-size refrigerator (most popular type due to its versatility and ease of conversion)
- compact mini-fridge (can be used for holding various size kegs)

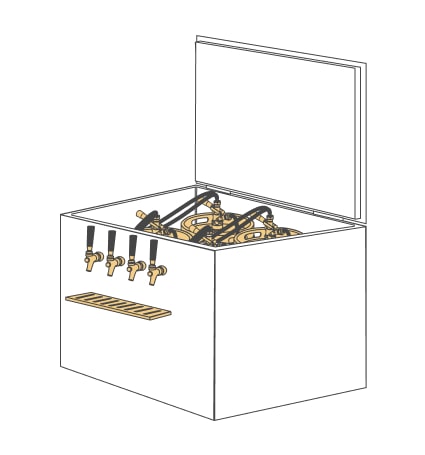
- chest freezer (often referred to as “Keezer” after the conversion)
An important factor in your decision is the type of kegs you want to use because their dimensions might not work in every option.
What You Need to Make Your Own Keg Fridge
Horizontal spilt refrigerators are the most popular type of fridge to start with because of their convenience. Whatever type of fridge you choose, you’ll need to start by measuring the depth and height to make sure your kegs will fit.
Once that checks out, it’s time to start the conversion process.
Tools
Here’s a list of all the tools you will need. Most of them are fairly standard and can be found in most households:
- 7/8'’ hole saw
- power drill
- flathead screwdriver
- spanner wrench
- hex wrench
In addition to these, you’ll also need a keg and a keg conversion kit – more on that below.
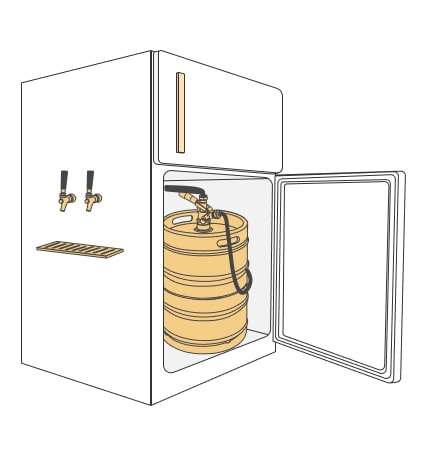
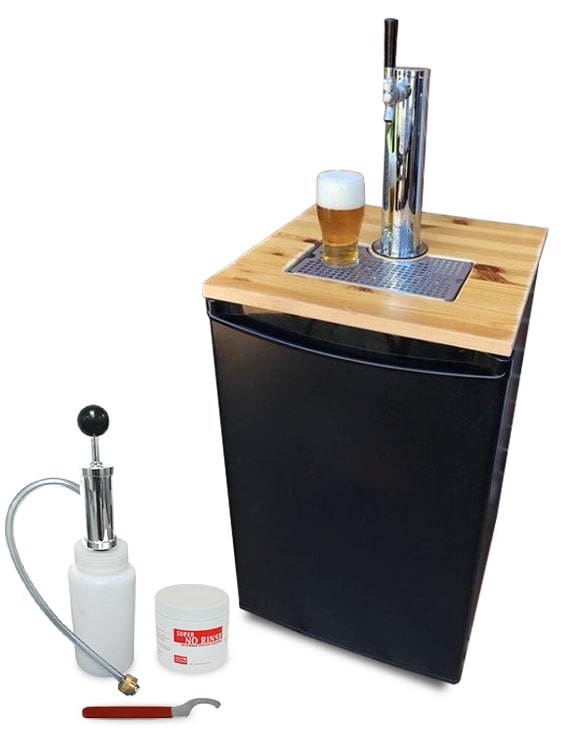
Keg fridge with a single or dual tap beer tower
If you want to keep both the work and the look as simple and basic as possible a standard keg fridge conversion kit will work for you.
This kit works well with a single or dual tap beer tower and typically consists of the following components:
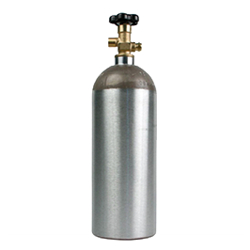
- CO2 tank (shipped empty)
When it comes to beer towers, there are two main choices to go with for your dual-tap keg fridge:
- standard cylinder kegerator beer tower
- personalized beer dispenser to match your Keezer style (from Industrial style to European style, there are practically no limits here)
If you want to add some flair to the look of your kegerator from this simple kit you can always choose fun, stylish beer handles to use on your tower.
Custom-built kegerator without beer tower
It’s also possible to make your own keg fridge with a beer faucet instead of a tower. A good option here is to go with a door kegerator kit or Keezer kit. These kits include all the tools and components you need for quick conversion.

How Much Does It Cost to Build a Keezer?
Of course, you can always buy a factory-made home/commercial grade kegerator or Keezer but that will cost you - and the price usually starts at around $700. Building a keg fridge is a much cheaper option - all it takes is $400 worth of materials, 2-3 hours of works, and some DIY skills.
If you don’t have a conversion-ready fridge instantly available in your basement, you can get one for cheap on eBay/Craigslist or Kijiji if you’re in Canada.
As for conversion kits, they are typically priced between $150 for a single-tap system and $250 for a double-tap system.
Step-By-Step Keg Fridge Setup Instructions
As we have mentioned before, you do not have to be a DIY guru to build yourself a nice, solid DIY keg fridge. All it takes is a few simple steps (here, we use a standard horizontal split refrigerator as an example):
- Drill the desired location
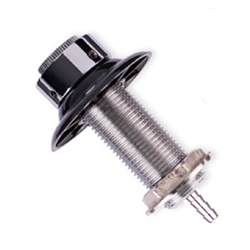
Using a hole saw drill, make a hole into the desired location. Don’t forget to check the inside of the fridge door and the distance from the freezer door so that you would be able to open the freezer without hitting the tap handle. Saw all the way through the door and the plastic liner inside it. - Connect the conversion kit
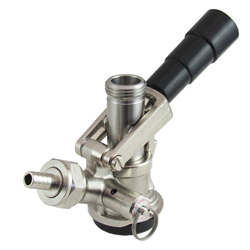
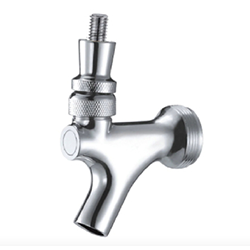
Unpack the conversion kit and start by placing the shank through the hole we’ve drilled earlier. Tighten the shank with the hex screw. Next, attach the faucet and tighten it with a spanner wrench.
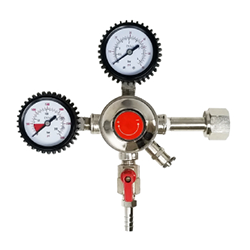
After that, attach the beer line hex connections to the back of the shank on the top of the keg coupler. Attach the air line to the nipple on the coupler and the one on the regulator, after which you will need to tighten the hose clamps with a flathead screwdriver.
Next comes the CO2 tank - attach the regulator, tighten with a hex wrench. Make sure that the faucet and the regulator switch are both in the OFF position. - Roll out the keg
Open the CO2 tank we connected earlier and attach the keg coupler to the keg you’ve placed inside the fridge. Adjust the pressure to a range of 10-12 psi and then turn it on to let the CO2 flow to your keg.
That’s it! If your keg is chilled enough, then you can start pouring.
Home Keg Fridge Cleaning & Maintenance
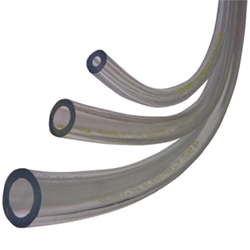
If you decided to build a solid home kegerator and looking to get a nice keg fridge conversion kit in Canada, don’t forget to buy some beer line cleaning tools while you’re at it. This is really important if you want to maintain your homemade Keezer in good condition.
If your kegerator pours foamy and flat beer, be sure to check our Bad Beer Troubleshooting.
You May Be Also Interested In
- How Long Does a Keg Stay Fresh in a Kegerator
- Why Is the Beer from My Kegerator Foamy and How do I Fix It?
- How to Clean Kegerator Beer Lines at Home
- Best Kegerator for Home Use 2023


