
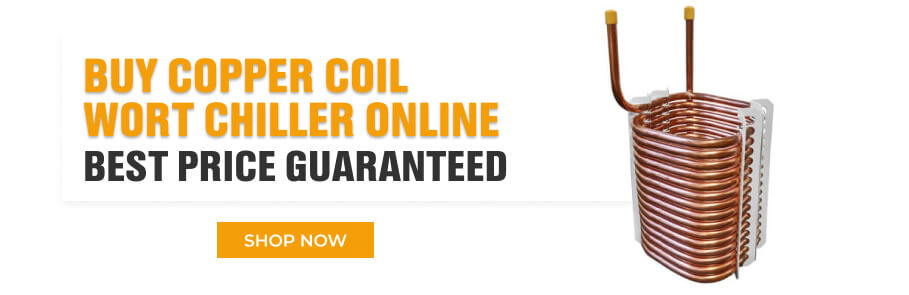
How to Make a Wort Chiller for Homebrewing
Posted by Ron on 12th Apr 2021
Wort chilling is an integral part of the beer brewing process and having a reliable DIY wort chiller can help you save on water and get a better product in the end.
Since any wort chiller is simply a heat exchanger used to rapidly cool the wort down to yeast pitching temperatures, it makes perfect sense to build your own by using some basic DIY skills.
In this article, we'll walk you through the process of making different kinds of wort chillers for your homebrewing setup.
DIY Wort Chiller Parts List
You don't need any fancy equipment, tools, or parts to DIY a copper or stainless steel wort chiller DIY. The main part you are going to need is a ⅜” OD (outer diameter) 20-ft soft copper tubing - although its length can be adjusted depending on the size.
The other items on your DIY wort chiller parts list may include:
- ⅜” to ½” compression adapter
- 14 to 18 gauge copper wire
- ⅜” silicone tubing
- tube clamps
The tools required for the job are:
- two wrenches
- 3/8" soft copper tubing bender
- drill with a 1 to ½" hole saw
- pipe cutter
Once you’ve got these together, it's time to start building. Which building process you use will be slightly different depending on the type of your wort chiller.
How to Make an Immersion Wort Chiller
Making an immersion DIY wort chiller isn't a huge challenge and can be handled even by those who have beginner DIY skills. The parts and tools required for a DIY immersion wort chiller:
- ⅜’’ copper coil tubing, which is usually 25 or 50 feet in length per unit
- Solid bare copper wire
- 2 brass dishwasher fittings (⅜’’ compression to ¾ garden hose)
- Wrench
- Pipe bender kit (optional)
- Pipe cutter and wire cutter
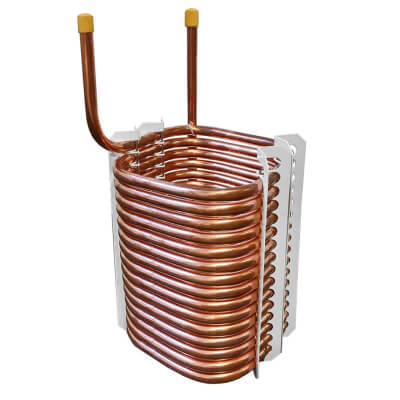
First, you need to decide on the height and width of your coils, and the spacing between them. Keep in mind, coils must be shorter than the pot they are going in. Calculate the appropriate diameter for your coils and proceed to the bending stage.
To bend your copper tubing properly, you can use a pot or brew kettle of the right diameter (you should already have one in your homebrewing equipment). Start wrapping the coil around the pot ensuring proper spacing. Leave a few feet unbent on one end because it has to stick out the pot slightly.
Space out the coil using the bare wire leaving a space of few inches between the coils to make sure the cooling is done right.
Bend the other end using a pipe bender to make sure it also sticks out the pot, too next to the first end. Put dishwasher fittings on both ends of the coil and tighten them with a nut. That’s it - that how to make a wort chiller!
How to Make a Counterflow Wort Chiller
Building a DIY counterflow wort chiller is not all that difficult. Since any counterflow chiller features a tube-inside-a-tube design, you are going to need:
- 1 mm (1/32’’) copper wire
- ½’’ copper tubing
- Two ½’’ NTP and hose brass fittings
- ¾’’ ID clear PVC tube
Here’s how it all works: you wrap the copper wire around the copper tubing and then put it inside the PVC tube. The hot wort runs through the copper pipe while the cold water flows on the outside in the opposite direction through the PVC tube.
Here are the main steps of building a DIY counterflow wort chiller:
- Roll the copper tubing straight on the floor/ground
- Start wrapping the copper wire around the tube. Add flux and weld to keep it in place
- Work your way up the copper pipe welding the wire every 4’’ to keep the coil in place
- Once you’ve wrapped the wire around the whole pipe, check for any lumps or sharp ends and remove them
- Start inserting the copper pipe into the PVC tube. You may use liquid soap as a lubricant to ease the pipe into the tube
- Wrap the PVC tube (now with the copper pipe inside) around a keg to create a coil
- Attach the brass fittings to both ends of the pipe and secure them with a clamp
- That’s it! Now you can test your DIY wort chiller counterflow for leaks
DIY Recirculating Wort Chiller
To build a DIY recirculating wort chiller, you will need the following items:
- Immersion chiller with 2 hoses attached (see above)
- Submersible recirculation pump (500 GPH model would do)
- ½’’ ID clear PVC tubing
- ¾’’ MHT x ½’’ FIP adapter
- ½’’ hose barb x ½’’ MIP adapter
- Hose clamps, thread sealing tape
The actual building process features the following steps:
- Cut a 5-ft long piece of PVC tubing
- Slide the barb inside one of the PVC tube ends and fix it with a hose clamp
- Wrap some thread sealing tape around the thread and screw on the garden hose adapter
- Cut another 5-ft long piece of PVC tubing and insert it over the ½’’ outlet on the recirculation pump, tighten it with a hose clamp
- Connect both PVC tube ends to the immersion chiller. Put the pump and the other end of the PVC tube inside a reservoir filled with iced water
DIY Glycol Wort Chiller
Building a DIY glycol wort chiller may require some time and skills, but the end result is worth it. Glycol wort chillers provide quicker cooling than their counterparts and are also environmentally friendlier since no tap water is required.
For the building process, you will need to get a used AC unit (~5,000 BTU) and strip it down leaving just the tubing and the main switch. Next, you have to bend the copper coil, carefully not to break it, and put it in a bath that will be filled with glycol later.
To control the glycol temperature, you will also need a controller. Make all the necessary connections and hook up your chiller to a conical fermenter.
If you want to skip ahead and get a ready-made glycol chiller, be sure to check some of the fermenter glycol chillers online. At Beverage Craft we have a plenty of draft beer equipment available, ball lock kegs, immersion wort chillers, and more.