How to Brew an IPA at Home: Step by Step Instructions
Posted by Ron on 6th Dec 2022
Who doesn’t love the fresh and original taste of IPA? Some say it can only be achieved by professional brewers who know how to make an IPA, but we beg to differ. With a beer-making kit, you will be able to make India Pale Ale in no time, and we are going to tell you how.
If you’re new to the concept of beer-making kits, be sure to check out this article first, where we give a nice roundup of what’s hot on the market right now.
IPA Ingredients
A typical IPA beer-making kit features all the IPA beer ingredients that you need to brew a gallon or so of fine beverage right in your kitchen. Here is a list of standard India Pale Ale ingredients:
- All-grain IPA mix
- Beer-making yeast
- Glass fermentation jug
- Thermometer racking cane
- Tubing
- Tubing clamp
- Screw-cap stopper
- Airlock
- No-rinse sanitizer
Is that it? Well, not quite. If you know a thing or two about brewing, you probably noticed that hops are missing. Hops are one of the key ingredients in IPA beer, and that’s why we have dedicated a special paragraph to them (more on that below).
Hops for IPA
Since IPA beers have such a distinct taste, one has to use a specific set of IPA beer hops to achieve that taste – otherwise, you might end up with a totally different beer.
Among the most common hops used for Indian pale ales are Cascade, Simcoe, Amarillo, Chinook, and some other American hops that are responsible (along with yeast for IPA) for that classic IPA citrus character.
What Are the Best Home Brew IPA Kits Out There?
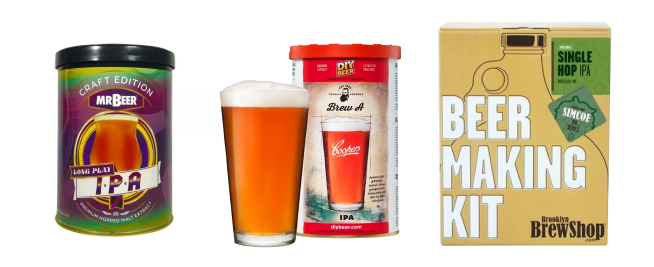
When it comes to the best home brew IPA kit, three brands usually come up:
- Mr. Beer
- Coopers
- Brooklyn Brew Shop
Each of these brands has at least one IPA home brew kit in their product range, and the difference between them is too subtle to single out the best one. Overall, beer making kits by Brooklyn Brew Shop are the most well-rounded, so you might want to try them first.

Instructions on How to Make IPA Beer at Home With a Kit
These simple instructions below will give you a clear idea of how to brew an IPA at home using nothing but a Brooklyn Brew Shop Brewdog Punk IPA beer-making kit and a few household items you can find in your kitchen. Brewing an IPA step by step is easy – just follow the instructions, and you’ll know how to make India Pale Ale in no time.
1. Pre-Brew
Sanitize The very first thing you need to do is grabbing the sanitizer packet and dissolving half of it with a gallon of water in a large bowl. Soak all the equipment you’re going to use in this bowl with sanitizer and save the second half of the sanitizer packet for bottling.
2. The Mash
Heat around two and a half liters of water to 71 degrees Celsius (160 degrees Fahrenheit). Once your water is up to the correct temperature, take the all-grain mix bag, cut the top right off it, and empty the contents into the hot water.
As you are stirring the grains, remember to observe the mash temperature for IPA. The best mash temp for IPA is between 63 and 68 degrees Celsius (144 to 152 Fahrenheit). Leave it like that for a solid 60 minutes, and then turn the heat up to 77 degrees while stirring actively (this will help the grains to get loose before the next stage).
3. The Sparge
Take the pot and empty it in a bowl through a strainer to filter out all the grains and let the liquid through (this is, in fact, going to be the beer). Ideally, you should have 4.75 liters of liquid that’s called “wort”. If you have less than that, heat up some more water and add that to the mix through a strainer. The IPA sparge temp should be close to boiling.
4. The Boil
Put the pot with the wort back on the stove, bring it to boil (or until you see a foam on the top), add five or so pellets of Ahtanum hops, drop the temperature a bit, and keep it on a low-boil like that for another 45 minutes. Then, add another batch of hops – this time, with Chinook hops (⅔ of the packet) and then whatever’s left of the Ahtanum hops. Once the 60 minutes boiling period is up, add the remaining hops (Chinook and Simcoe).
Ideally, you should have around a gallon of liquid by this point, with the extra wort evaporating during the boiling process. Cool the wort down to room temperature (21 degrees Celsius).
5. Fermentation
Once the wort is cooled down to the appropriate temperature, pour it into the glass fermentation jug through a small strainer and a funnel. Once it’s all in there, pitch the yeast: open the packet and pour its contents inside the fermenter.
After that, shake the fermenter aggressively (covering it with your palm that you have pre-sanitized). Cover the fermenter with a cap, insert the tubing, and let the other end into a small bowl filled with sanitizer.
Once the aggressive bubbling subsides (takes 2-3 days), remove the tubing, apply the airlock, and leave it like that. How long to ferment IPA before bottling? As a rule, it should be around two weeks, so that’s your IPA fermentation time.
As for the IPA fermentation temperature, we recommend 19 degrees Celsius. This should be an ideal fermentation temp for IPA.
6. Bottling (Two Weeks Later)
Once the fermentation is over, it’s time for everyday IPA bottling. First, you have to siphon the beer into a sanitized pot using the racking cane. Then, you siphon the beer from that pot into bottles (again, pre-sanitized), close them, and let them stay for another 2 weeks.
7. Enjoy (Two Weeks Later)
After 2 weeks in a dark place at 19 degrees Celsius, the beer is ready to drink! Be sure to put it in the fridge before drinking. Enjoy!
How to Make IPA Taste Better
The basic IPA brewing process looks exactly like we’ve described it here. However, if you’re after an award-winning IPA recipe, you might want to add a couple of tablespoons of honey at the bottom of the pot during step 6, right before you siphon the beer off the fermenter. That’s how to home brew IPA!
