
How to Size a Glycol Chiller for Your Draft Beer System
Posted by Ron on 11th May 2026
Getting BTU sizing right is one of the most important decisions in any draft beer system, whether you are building out a neighbourhood bar, a busy brewery taproom or a high-volume stadium concession. This guide walks through everything you need to know: what glycol chillers do, how the BTU formula works, real-world examples by venue size and how to match the right unit to your setup.
- BTU sizing determines whether your chiller keeps up with your system - undersized means foam and warm beer; oversized means wasted energy and premature wear.
- The correct formula: [(Faucets × 100) + (Trunk Length × BTU/ft) + 500] × 1.25 - accounts for faucet heat load, trunk line heat gain, base overhead and a safety buffer.
- Air-cooled units suit most bars and small breweries; water-cooled units are the right call for high-volume or enclosed environments.
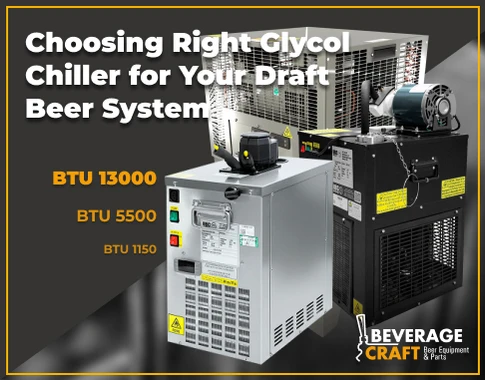
- BeverageCraft offers glycol chillers rated from 1,150 to 13,000 BTU/hr, with runs up to 750 ft depending on the model.
- Regular maintenance - glycol checks, coil cleaning, annual flushes - protects your investment and keeps every pour consistent.
What Is a Glycol Chiller and Why Do You Need One?
A glycol chiller is a refrigeration unit that circulates a chilled mixture of propylene glycol and water through the trunk line running alongside your beer lines. By keeping that glycol mix at temperature - typically around 28-32°F - the chiller ensures your beer stays cold the entire distance from keg to faucet, even if that distance is measured in hundreds of feet.
Without a chiller, any draft system where the keg storage and the tap tower are separated by more than a short distance will struggle with temperature consistency. The beer picks up heat as it travels and heat means foam, flat pints and waste. A properly sized glycol system eliminates that problem entirely.
Glycol chillers are the backbone of long-draw systems used in:
- Bars and restaurants where the walk-in cooler is in the back and taps are at the front
- Brewery taprooms serving directly from a cellar
- Stadiums, arenas and large venues with multiple bar stations
- Outdoor events and mobile setups requiring portable cooling
How the Refrigeration Cycle Works
Inside the chiller unit, a compressor and evaporator coil drop the glycol-water mix down to your target temperature. A pump then pushes that chilled fluid through the trunk line - the insulated bundle that houses both your glycol lines and beer lines together. The glycol absorbs heat from the beer as it travels, then returns to the chiller to be cooled again. The cycle runs continuously during service.
Depending on your setup, a trunk line can carry anywhere from 2 to 16 beer lines alongside one to four glycol lines, all wrapped together with insulation to minimise heat gain from the surrounding environment.
Air-Cooled vs. Water-Cooled: Which One Is Right for You?
Releases heat into the surrounding air through a condenser fan. Simpler to install, lower upfront cost and the right choice for the majority of bar and restaurant applications.
- Best for: bars, small breweries, restaurants
- Requires adequate ventilation around the unit
- Less effective in hot, enclosed mechanical rooms
Uses a water supply to carry heat away from the condenser. More efficient when ambient temperatures are high or when you cannot afford to add heat to the room.
- Best for: high-volume venues, enclosed spaces, hot climates
- Requires a water supply and drain connection
- Higher efficiency under heavy load
For most bars and restaurants in temperate climates, an air-cooled unit is the practical and cost-effective choice. If your mechanical room runs hot, your venue has extremely high pour volume or you are in a space where adding heat to the room is a real problem, it is worth considering a water-cooled configuration.
Why Getting the BTU Size Right Actually Matters
It is tempting to either guess or just buy the biggest unit available to be "safe." Both approaches create real problems.
- Cannot maintain temperature during peak service
- Beer pours warm, foamy or flat
- Compressor runs constantly, leading to early failure
- Higher waste, more customer complaints
- Higher purchase cost and energy bills
- "Short cycling" - unit turns on and off too frequently
- Short cycling stresses the compressor and reduces its lifespan
- No improvement in beer quality
The goal is to match your chiller's output to what your system actually demands - accounting for your number of taps, the distance beer travels and the conditions in your venue.
How to Calculate the BTU Load for Your System
Use this formula to calculate the minimum BTU/hr your chiller needs to handle. If you prefer to skip the manual math, use our free BTU sizing calculator.
BTU/hr = [(Faucets × 100) + (Trunk Length × BTU/ft) + 500] × 1.25
- Faucets × 100 - Each faucet adds approximately 100 BTU/hr of heat load to the system
- Trunk Length × BTU/ft - Heat gain along the trunk line; typically 7-13 BTU/ft depending on insulation and ambient conditions
- 500 BTU/hr Base Load - Fixed overhead to cover system inefficiencies and ambient heat pickup
- 1.25 Safety Factor - Ensures the chiller can handle real-world peak service without straining
Example Calculation
A bar with 8 faucets and a 75-foot trunk line, using 10 BTU/ft:
[(8 × 100) + (75 × 10) + 500] × 1.25 = [800 + 750 + 500] × 1.25 = 2,563 BTU/hr required
Always round up to the next available chiller model - never down. The safety factor is already built in, but rounding up gives you additional headroom for unusually busy service periods.
Skip the math - use our free BTU sizing calculator. Enter your faucet count, trunk line distance, environment type and it does the rest.
Use the Free BTU Calculator →BTU Reference Table
Estimated BTU/hr requirements at common trunk line distances and faucet counts, calculated using 10 BTU/ft and the 1.25 safety factor.
Estimated BTU/hr requirements by trunk line distance and faucet count:
| Line Distance | 4 Faucets | 6 Faucets | 8 Faucets | 10 Faucets | 12 Faucets |
|---|---|---|---|---|---|
| 25 ft | 1,438 | 1,688 | 1,938 | 2,188 | 2,438 |
| 50 ft | 1,750 | 2,000 | 2,250 | 2,500 | 2,750 |
| 75 ft | 2,063 | 2,313 | 2,563 | 2,813 | 3,063 |
| 100 ft | 2,375 | 2,625 | 2,875 | 3,125 | 3,375 |
| 150 ft | 3,000 | 3,250 | 3,500 | 3,750 | 4,000 |
Calculated using [(Faucets × 100) + (Trunk Length × 10) + 500] × 1.25. Adjust BTU/ft upward for warmer environments or poorly insulated trunk lines.
Real-World Sizing Examples
Small Bar or Restaurant (Short Draw)
4 faucets, 30-foot trunk line from a back-of-house walk-in cooler to the bar.
[(4 × 100) + (30 × 10) + 500] × 1.25 = 1,500 BTU/hr required
This example requires approximately 1,500 BTU/hr of cooling capacity for a 30-foot trunk line. The ChillPro 1150H, listed at 1,150 BTU/hr and a maximum 25-foot run, does not meet these requirements. The G30-3/8GP, listed at 2,600 BTU/hr and up to a 125-foot run, is a candidate for this setup. Before selecting it, confirm cooling capacity at the intended operating conditions and pump performance for the actual circuit.
Mid-Size Brewery Taproom
10 faucets running 75 feet from the cellar to the taproom bar.
[(10 × 100) + (75 × 10) + 500] × 1.25 = 2,813 BTU/hr required
Compare the calculated load with the ChillPro 7500 and CP-13000-2 ratings at the intended operating conditions. Their listed capacities are 7,500 and 13,000 BTU/hr respectively, and the CP-13000-2 is rated for runs up to 750 ft. Confirm pump performance for the actual circuit before selecting either model.
Large Venue or Multi-Bar Operation
20 faucets across two bar stations, with trunk lines running up to 125 feet.
[(20 × 100) + (125 × 10) + 500] × 1.25 = 4,688 BTU/hr required
A single high-capacity unit or two mid-range units running in parallel will cover this load. For stadiums and large entertainment venues, multiple ChillPro 13000 units are a common configuration. Contact our team to discuss the right setup for your layout.
Installation: What to Get Right From the Start
A correctly sized chiller still needs a correct installation. A few areas where setup quality has an outsized impact on long-term performance:
The chiller needs to exhaust heat somewhere. Installing an air-cooled unit in a tight, unventilated closet will cause it to work harder than necessary and shorten its lifespan. Allow adequate clearance on all sides and ensure the room has some airflow.
Use the food-grade propylene glycol concentration recommended for your chiller and operating temperature. Some systems specify 35% glycol and 65% water; others require 40/60. Follow your equipment and coolant manufacturers’ instructions, including whether the ratio is measured by volume or by weight. Higher glycol concentrations increase viscosity and can reduce heat transfer performance.
The trunk line should be properly insulated, especially through any sections that pass through warm areas like kitchen spaces or exterior walls. Heat gain in the trunk line forces the chiller to work harder and can cause temperature inconsistency at the tap.
Installation by a qualified professional is required to maintain warranty coverage on most commercial chiller units - including all models available at BeverageCraft. A qualified installer holds a business licence and relevant trade credentials (HVAC/R, general contractor or electrician). This protects your investment and ensures the system is calibrated correctly from day one.
Common Installation Mistakes
- Sizing based on tap count alone, without accounting for line distance
- Placing an air-cooled unit in an enclosed, unventilated mechanical space
- Using the wrong glycol-to-water ratio
- Running trunk lines through unconditioned spaces without adding insulation
- Skipping the initial system calibration and pressure check
Keeping Your Chiller Running Well
A glycol chiller that is properly maintained will run reliably for years. The maintenance schedule is not complicated:
Recommended maintenance schedule:
| Frequency | Task | Key Checkpoint |
|---|---|---|
| Monthly | Check glycol levels in the reservoir; inspect and clean the air filter if the unit has one | Glycol level visible in sight glass; filter clear of dust |
| Every few months | Clean the condenser coils - dust buildup reduces heat exchange efficiency and makes the compressor work harder | Coils free of debris; unit not running hotter than usual |
| Annually | Check glycol concentration with a propylene glycol refractometer. Inspect coolant condition, check pump operation and inspect fittings for leaks. Flush and replace the coolant when required by the equipment or coolant manufacturer. | Glycol mix matches your chiller’s instructions (35/65 or 40/60) normal flow; no leaks. |
FAQ | Glycol Chiller Sizing
What actually happens if the chiller is undersized?
Is it okay to buy a larger chiller just to be safe?
What glycol-to-water ratio should I use?
Do all beer lines in the trunk need to be in contact with the glycol line?
Can one chiller serve multiple tap towers?
How far can a glycol chiller reach?
How often should the glycol be replaced?
Not sure which chiller fits your setup? Run your BTU numbers and browse our full lineup - or reach out to the BeverageCraft team directly for a recommendation based on your specific tap count, distance and venue type.
Browse Glycol Chillers